Would you like your vet visit to be pleasant and easy? Is your dog uncomfortable or does he have white coat syndrome? (yes this term is also used for dogs!) If so, this article is for you! Below we discuss what to practice to have your dog ready for possibly uncomfortable veterinary contentions.
Practising veterinary contentions

Dogs speak but only to those who listen. Learning canine body language can help prevent a serious incident at the vet. Your dog tells you when they don’t appreciate something. Learn to know what your dog is trying to tell you in order to make your training a success!
Desensitization is a behavioral modification process that exposes dogs to their fears in a slow, low-stress way that increases in difficulty over time. This helps teach the dog that they are not in danger and that no one is going to hurt them! This also has the amazing benefit of making veterinary practice much safer for all those involved as your dog already knows what to expect! So basically, there is no downside to this process. To desensitize a dog, you need to provide a positive stimulus (usually treats) while they’re exposed to the possibly frightening or uncomfortable trigger to help ensure the association is a positive one.
Your dog will likely have to be held by you or the veterinary staff. This is called contention. Here are a few positions that you can train for in advance by using desensitization and positive reinforcement!
Pro tip: Don’t forget to generalize your training! Make sure after you can do all these things to your dog that your family and friends can too! Try it in different places like at your local pet store or a friend’s house. Just because your dog does something one time somewhere, does not mean they will be comfortable in another context.
Picking up your dog: it is important to pick up your dog as shown. This is the most comfortable way for them to be picked up and it prevents their legs from flailing around (which is not so fun for your dog or your back). How do you train this? Everything should be practiced by progressively introducing the new behaviour and rewarded afterwards. For example, start by holding the dog in the stand position, wait a few seconds, let go and treat. Continue a few times so that your dog gets used to being held in such a way. Pick up your dog and put him down. Practice this a few times. Finally, your dog is ready to be put on a table (as will have to be done at the vet). Continue to practice this until your dog is comfortable being on a table, i.e. he doesn’t panic, fight back or show any signs of discomfort (learn your dog’s body language).w
Pro tip: You can pick your dog up like this and put them on picnic tables outside and/or use a towel on your furniture to help their stability.

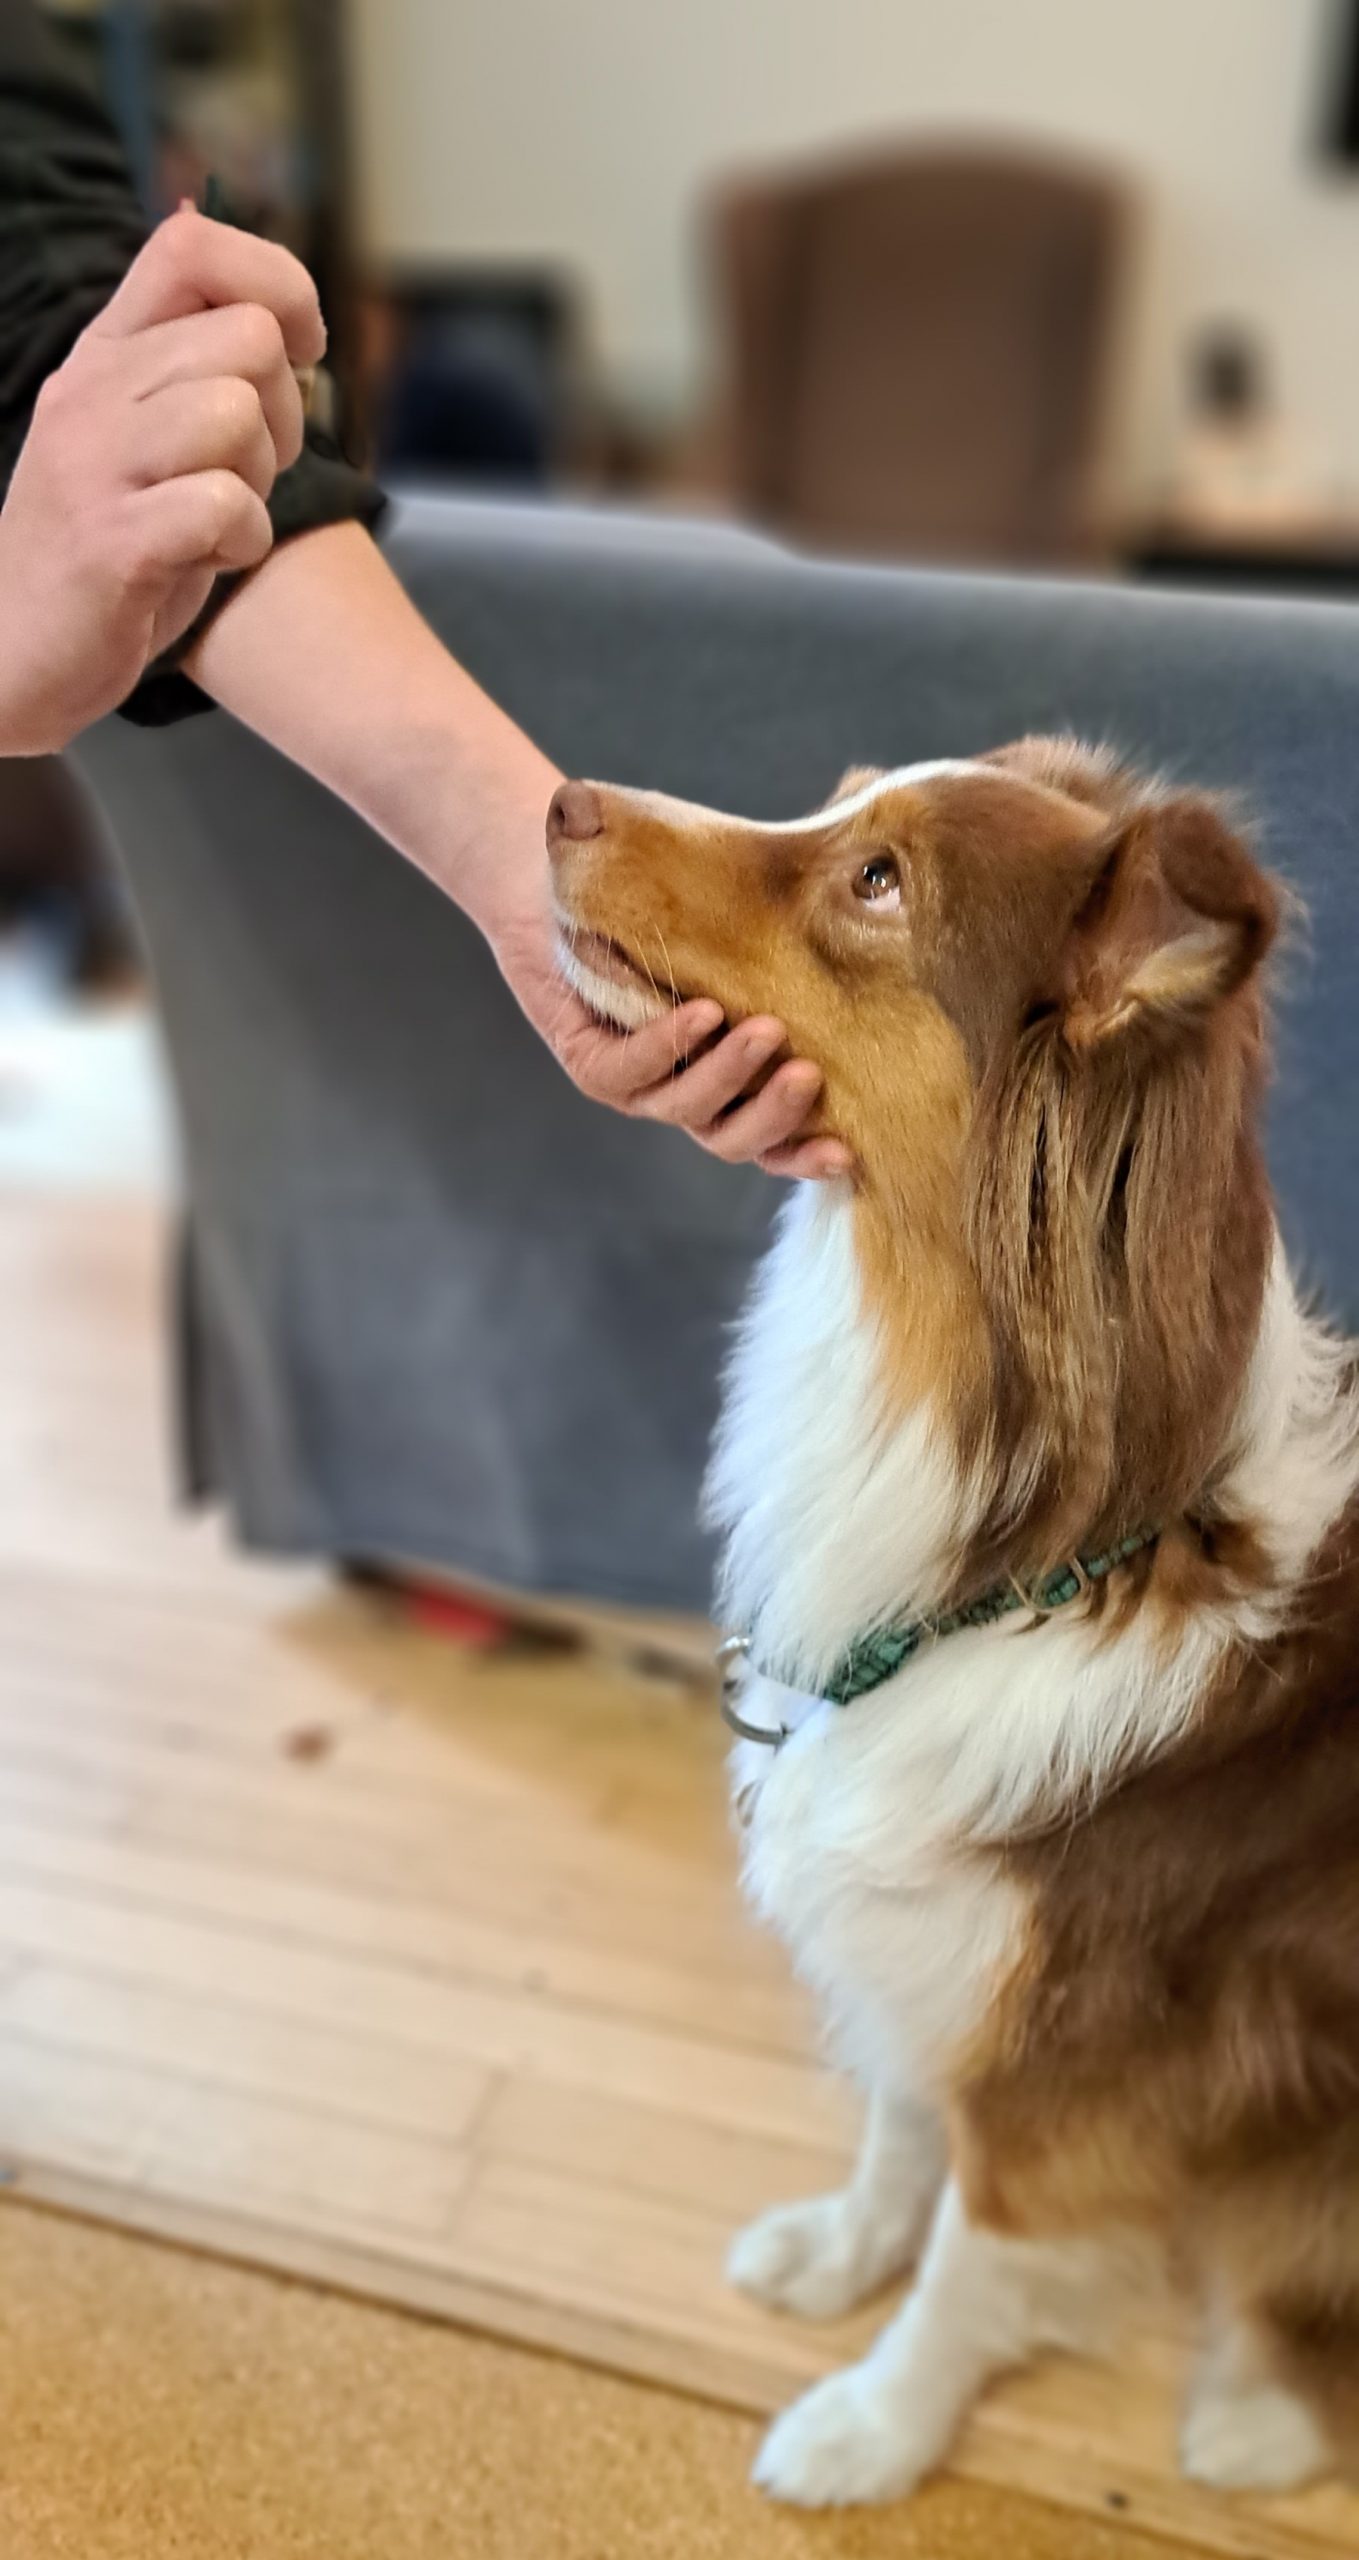
General Exam: Your dog may be held as shown below. The contention described looks like a big hug! (side note: most dogs don’t like hugs!). Usually the dog doesn’t fight this hold as it is comfortable to be held in such a way, however, if the dog does resist, a stronger hold may be used depending on what your vet needs. This means you need to practice the position with more pressure and duration. Be sure to increase pressure and time slowly while keeping your rate of reinforcement high.

Blood Draws: To give you a guideline, your dog will most likely have to be held in the positions featured below for a minimum of 30 seconds to one minute or more. If your dog is reluctant to be held, remember: baby steps. In training it’s easier on you and your dog to work up to this duration. In other words, don’t start by holding your dog with his head held high for the whole 30 seconds. Begin by simply having your dog held in these positions. Repeat many times, in different rooms in the house. Until your dog no longer resists (it’s really important to understand that in the elevated neck position, you are careful to avoid the front of the neck where your dog’s trachea is, if you’re touching the chin bone, you’re good!) . Once the hold is no longer uncomfortable, start adding the duration, one second, 5 seconds, 10 seconds, 12 seconds etc until you reach the ultimate goal!
Now add distractions: There are many smells, other animals, people busy working etc. at the vet. Try and create distractions at home that will challenge your dog but also, set your dog up for success. Work up to those distractions. It is not recommended to start by leaving his favourite treat on the ground and expect him to resist this temptation, instead, use a not so highly valued treat. Couple distractions with your previously practiced duration and you’re good to make your trip to the vet!
It’s important to understand that these behaviours take time to learn, it may even take a few weeks. This is all new to Fluffy! Plan to practice a few times a day during your regular training sessions.


Cystocentesis: Have you taught your dog to play dead? If so, you’re ahead of the game as that is the perfect position to use when performing this procedure. To get your dog on his side, start in the down position. Lure him by using his favourite treat onto his side: treat on the nose and towards the back paw, if he does not go on his side right way you are going too quickly with the lure, take your treat and reward in increments, as many as necessary as you make your way to the back paw. Your dog should flop on his side. Take the back paw and hold it up as is shown in the photo below. Add your duration and distractions as described in the blood draw section.

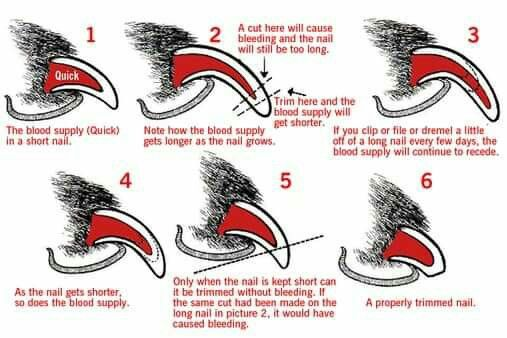
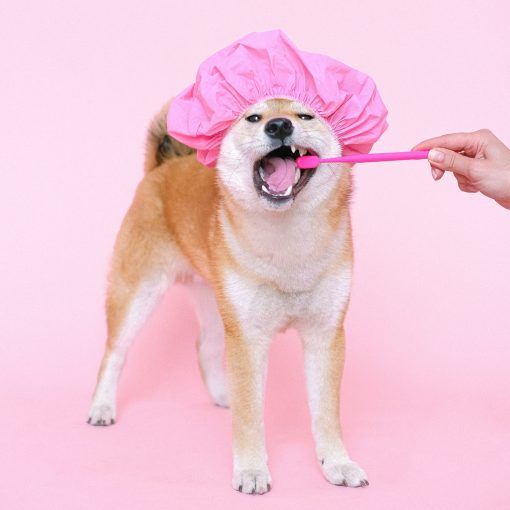
Nail Trim: Your dog will need a nail trim minimally every 3 weeks for the rest of their lives. That’s a lot of nails! To learn more about why and how to trim your dog’s nails, please visit out blog here: https://pourlamourdeschiens.com/en/2023/10/17/trimming-your-dogs-nails/ or see our videos here: https://www.facebook.com/reel/961520678447078 and here: https://www.facebook.com/reel/660483442807290.
There are 2 ways of putting your dog in position for the nail trim, on his side or standing with the paw bent towards the torso (for the front paws) or stomach (for back paws). To get your dog on their side, watch our nail trim videos. For the standing position you can hold your dog in position while they eat out of your hand and have someone hold their paws. Remember to slowly increase the time and pressure the person holds their paws for. You can also teach a great stand-stay and add during and distraction (something we teach in private consultation and our group classes).


Food helps every step of the process (and certainly during your exam!)
The scale: This is scary stuff! Likely the scale is stainless steel in order to facilitate cleaning. Go and see your vet once a month to be weighed and get some cookies! Maybe, just maybe, your dog will be excited to go to the vet as there is not always poking and prodding involved. The way to a dog’s motivation is through his stomach as food = changing your dog’s emotional state from frightened, anxious or aggressive to calm and well behaved. Don’t forget your local pet store usually has a scale! So go in (you know you’re going anyway) and weigh your dog. Bring delicious treats or even a towel to help him out (fyi – cutting their nails helps them stand more firmly on the scale and be less afraid!).

Darlene giving her best Belgian smile while on the scale.
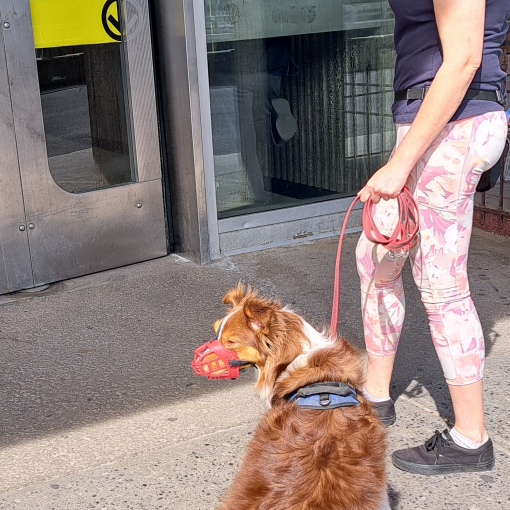
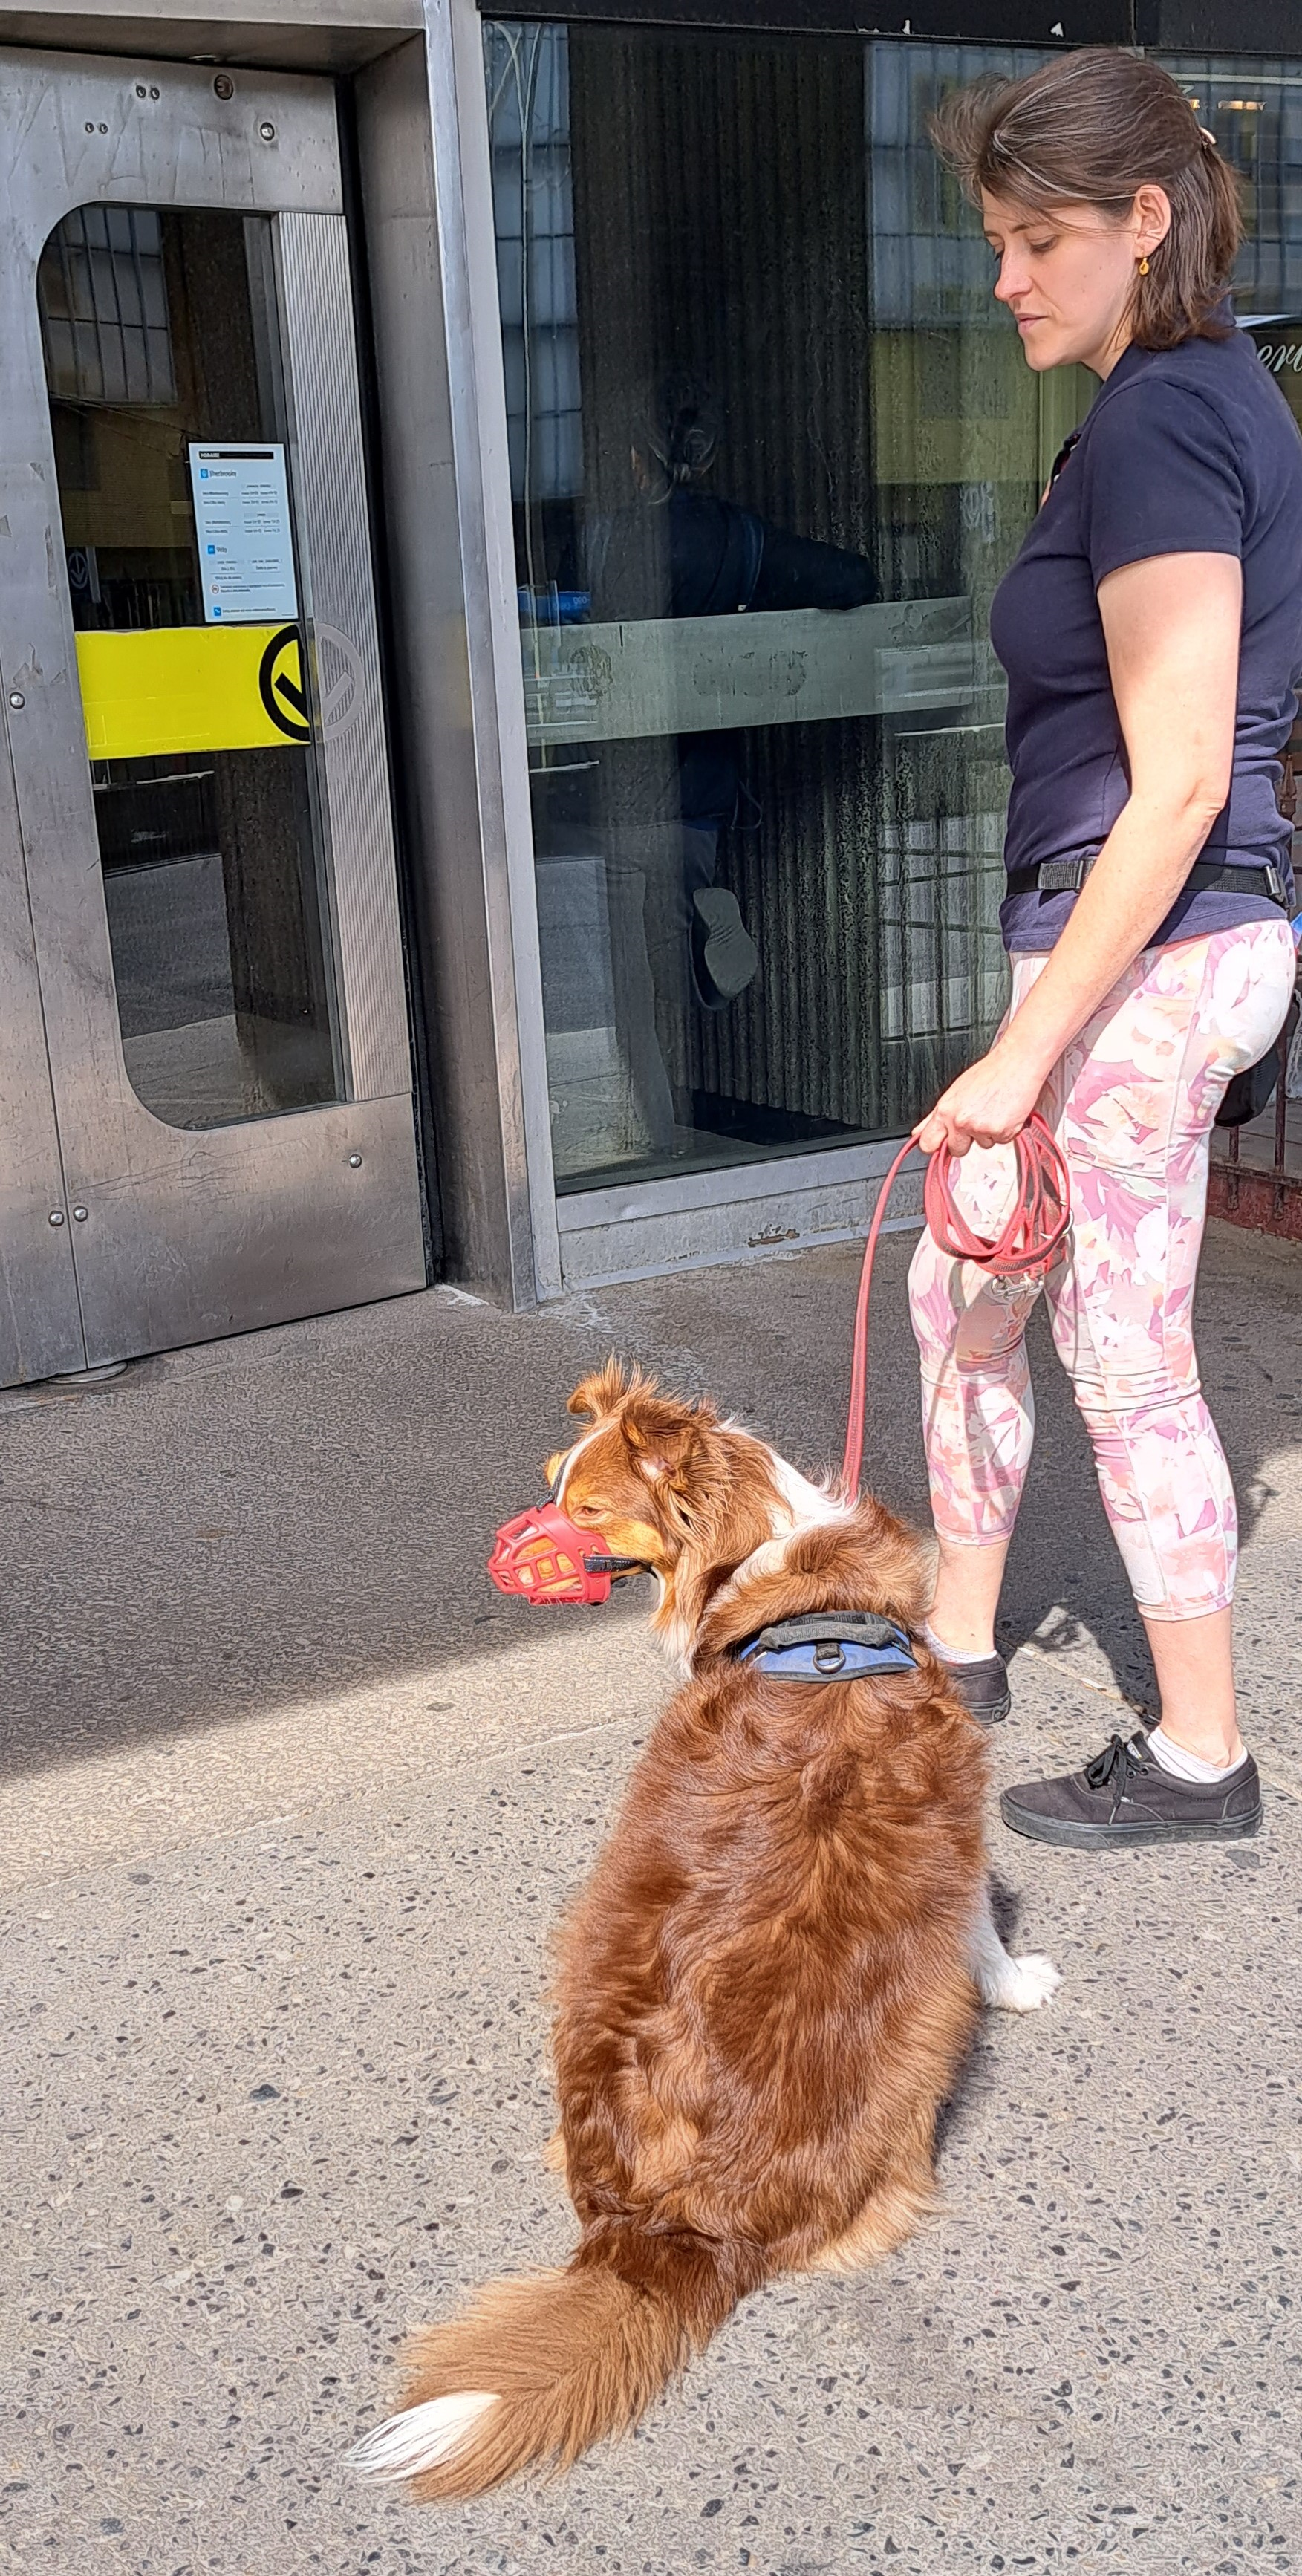
If you would like more information in regards to husbandry techniques or any behaviour modification feel free to reach out to pourlamourdeschien.com. It will be our pleasure to help you and your dog to prepare in order to make everyone’s life better! We also help people whose dogs are more afraid, require muzzles or who have a bite history.
Merci à nos stars : Brandy, Mia, Didie et Darlene !
Carolyne Baker
Intervenant en Éducation Canine, TA
Pour l’Amour des Chiens/For the Love of Dogs
